Pattern - No 017


Bunny Bag

What's Included
-
– Pattern in A3 and A4 format
 Bunny BagSchnittmuster (PDF) - DIN A4, DIN A3, US-Letter3 Files
 - – Detailed instructions with 13 illustrated steps
- – Complete materials and tools list
-
– 7 basics guides with tips and tricks
- • Why and How to Finish Fabric Edges
- • Pen, Chalk, or Marker? How to Mark Fabric Properly
- • Which Interfacing or Non-woven Interlining is Best for Bags?
- • Why and How to Clip Corners and Curves
- • How to Use a Turning Tool Properly
- • How to Shape Corners and Curves Properly
- • How to Sew a Ladder Stitch
- – Multilingual support (DE/EN)
- – Everything in One Place
Required Materials
-

Outer fabric: 75 x 20 cm
For the outside of the bag and the ears.
Plush or faux fur fabric, soft and preferably non-stretch.
-
Lining fabric: 120 x 25 cm
For the lining, inside of the ears, drawstring casing, and bag strap.
Light cotton fabric, non-stretch.
-
Interfacing / Non-woven Interlining (optional)
For stabilizing the bag, ears, and bag strap.
Depending on your fabric choice, you can use fusible interfacing or non-woven interlining.
-
Cord: 5 mm × approx. 1 m
For the drawstring.
In this example, a cord was made from the lining fabric itself.
-
Safety eyes: 9 mm, 2 pieces
For the face. Alternatively, you can sew or embroider the eyes.
-

Embroidery floss
For embroidering the nose (and optionally the eyes).
-

Sewing Thread: Universal sewing thread, thickness 120 Suitable for the recommended needle size NM 70–80.
Required Tools
-
Sewing Machine
-
Scissors - A large fabric scissors for cutting and a small thread snip for precise work.
-

Pins or Fabric Clips
-

Measuring Tool
-

Iron – For securing interfacing and smoothing sewn parts, essential for a clean finish.
-

Chalk or Fabric Marker - For marking dots and seam lines, choose a removable marking tool such as tailor’s chalk or a fabric marker.
-

Needle: For embroidering and closing the turning opening.
-

Bodkin or safety pin - for easily threading the cord through the drawstring casing.
-

Blunt Tool: For shaping curves and corners, such as a corner shaper, chopstick, or crochet hook.
-

Turning Tool – For turning small parts – alternatively, you can use a straw and a stick.
-

Awl
Description
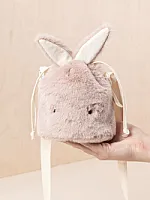
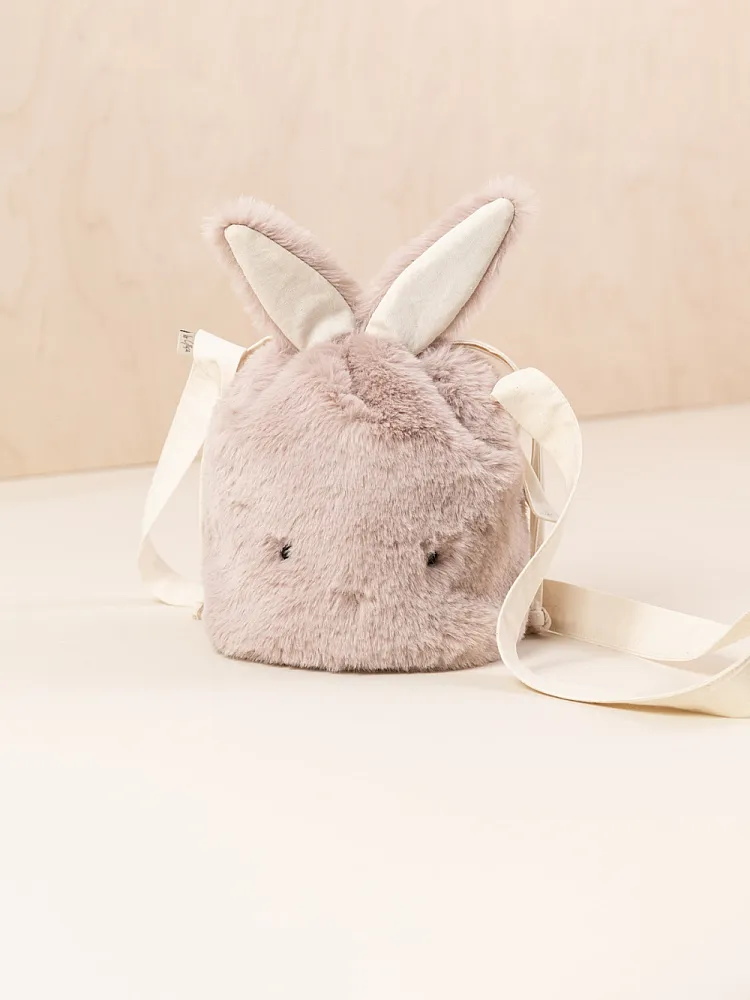
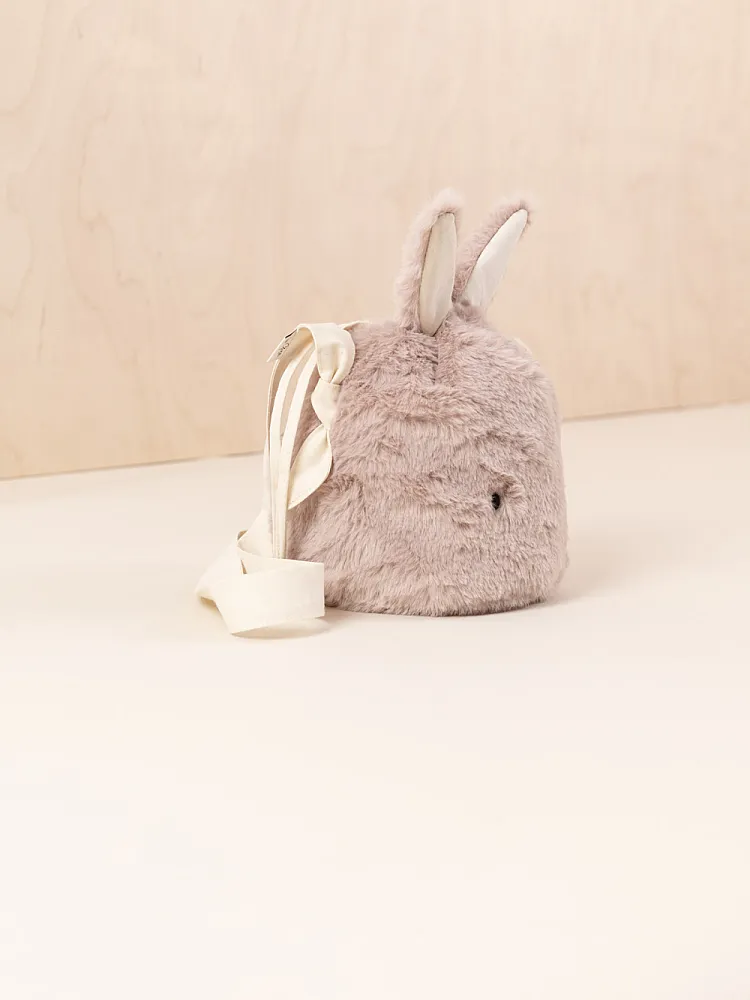
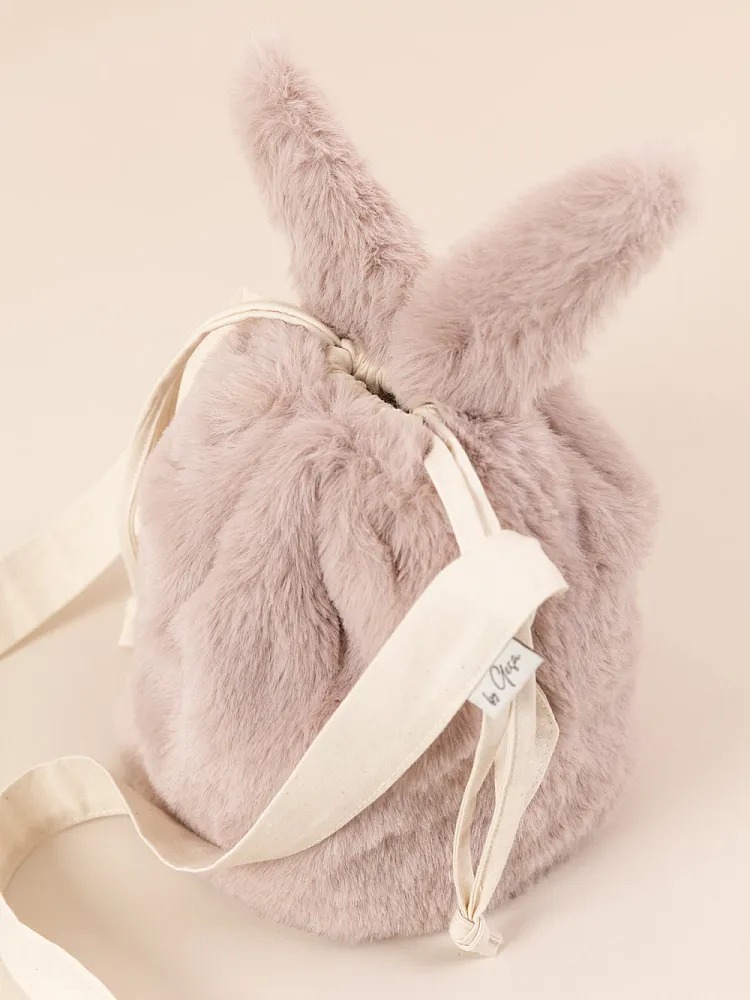
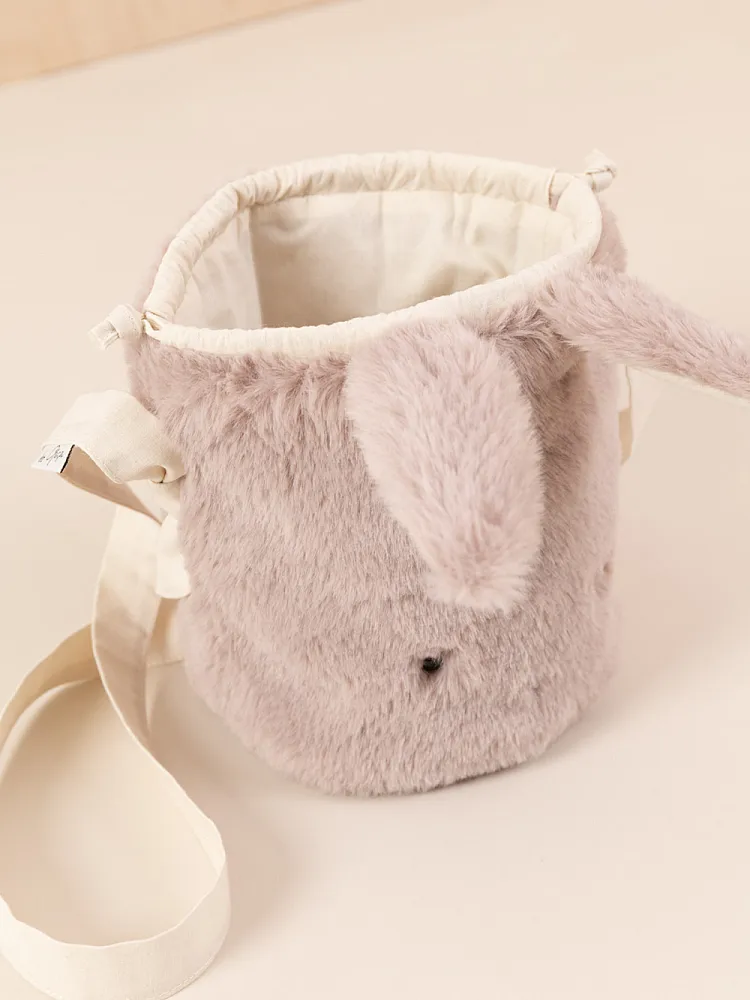
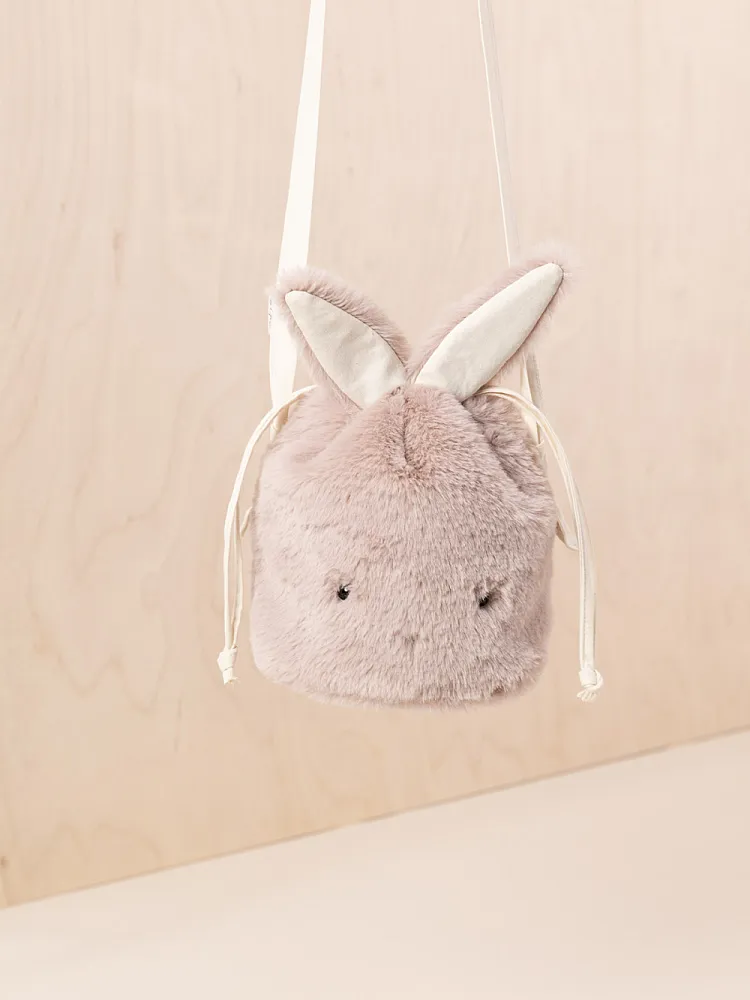
My daughter could never have enough bags - until her beloved cat bag broke. Since she was really into rabbits at the time, I decided to make her a new one - this time in the shape of a cute bunny. This little crossbody bag is not only a charming companion, but also practical for all the little things kids like to carry around.
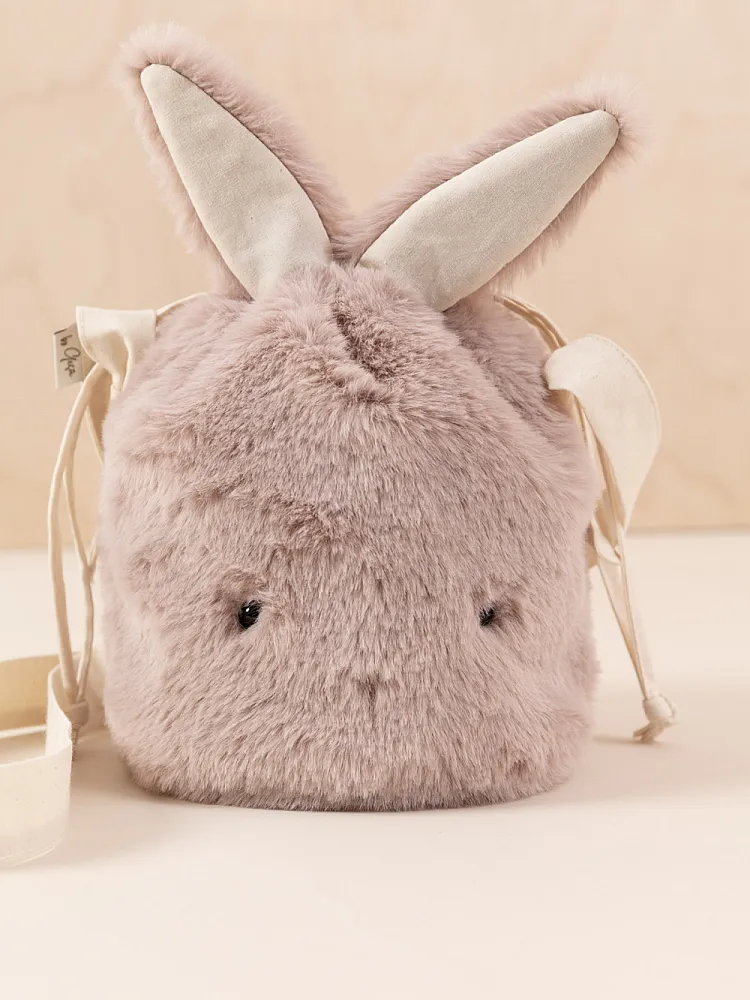
The rabbit is made of soft plush and its round design offers plenty of storage space without being too large. It's perfect for toys, snacks, or other little treasures that need to be close at hand. I especially like using a matching patterned fabric for the ears, drawstring and lining - it gives the bag even more character.
The Rabbit Crossbody Bag is easy to sew, but it does take some skill, especially sewing the round bottom and assembling the pieces correctly. However, if you have completed a few sewing projects before, you will be fine with these instructions.
For the bag strap, I chose to sew it on permanently, but you could also use D-rings to make the strap removable (this step is not described in the instructions). If the bag is for a younger child, I recommend sewing on the eyes and leaving off the strap.
It's just adorable how this bag becomes a little friend that looks after all the kids' treasures - essentially a stuffed animal that they don't have to carry around.
- Cute bunny design: A cuddly companion perfect for outdoor adventures or kindergarten.
- Free choice of fabrics: Plush, faux fur, minky fleece, or woven fabric-just be sure to use appropriate interfacing to keep the bag sturdy.
- Some skill required: Ideal for sewers with some experience. The round bottom and drawstring require some practice.
- Customizable: With patterned fabrics for the ears, drawstring, and lining, you can customize the bag to your liking.
- Safe and durable: Eyes can be sewn on, and the strap can be made removable to adjust the bag for smaller children.
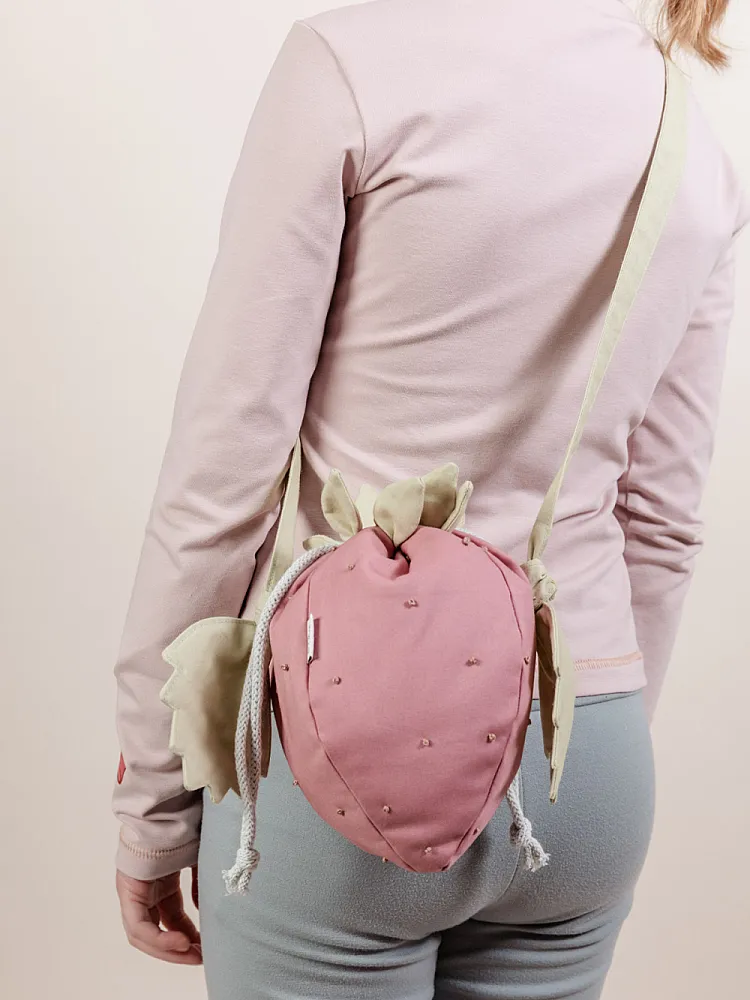
Size of finished bag: Approximately 13 cm x 13 cm (not including ears).
Pattern - No 017
Bunny Bag
What's Included
-
– Pattern in A3 and A4 format
Bunny BagSchnittmuster (PDF) - DIN A4, DIN A3, US-Letter3 Files
- – Detailed instructions with 13 illustrated steps
- – Complete materials and tools list
-
– 7 basics guides with tips and tricks
- - Why and How to Finish Fabric Edges
- - Pen, Chalk, or Marker? How to Mark Fabric Properly
- - Which Interfacing or Non-woven Interlining is Best for Bags?
- - Why and How to Clip Corners and Curves
- - How to Use a Turning Tool Properly
- - How to Shape Corners and Curves Properly
- - How to Sew a Ladder Stitch
- – Multilingual support (DE/EN)
- – Everything in One Place
Reviews
Loading reviews...
(5/5)
I was very pleased with the pattern for this little bunny bag, I found it easy and clear to follow and was pleased with the results. Thank you.
(5/5)
Such a beautiful pattern, can't wait to start making 😍
Related Products
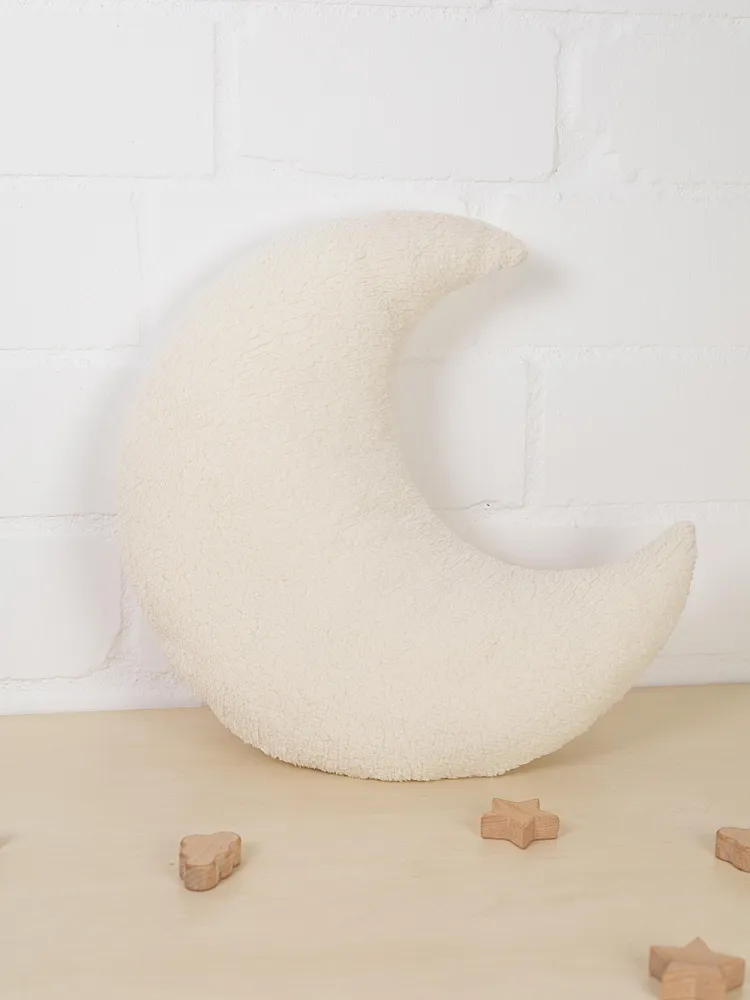
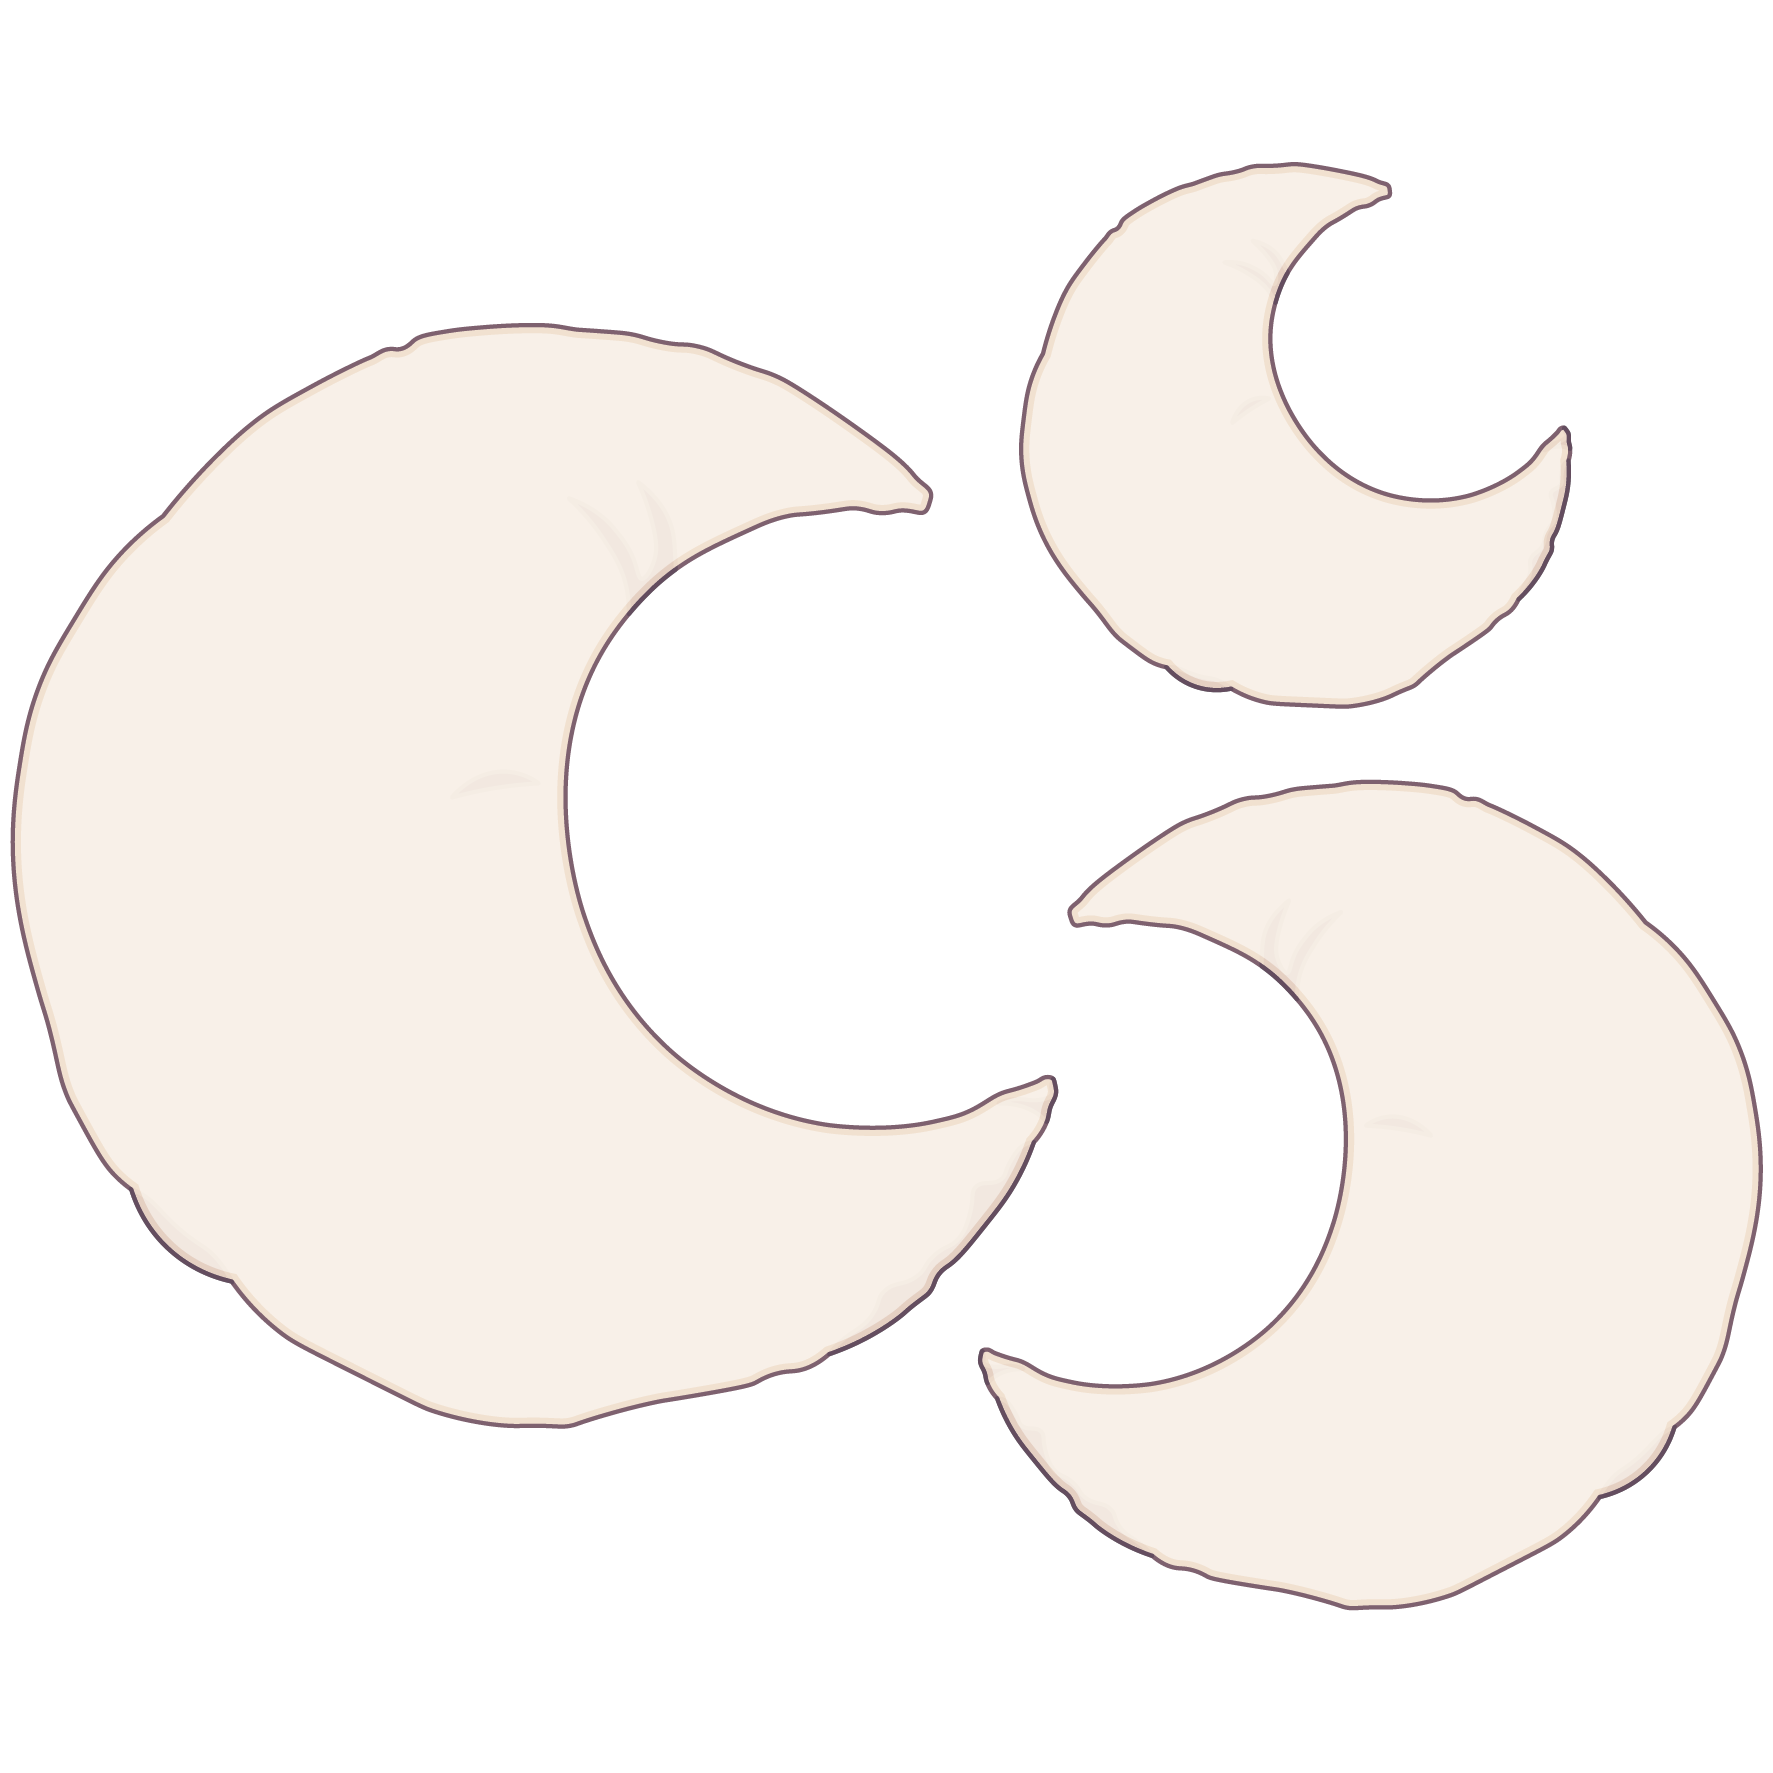
Moon Pillow
(8)
3,36 €
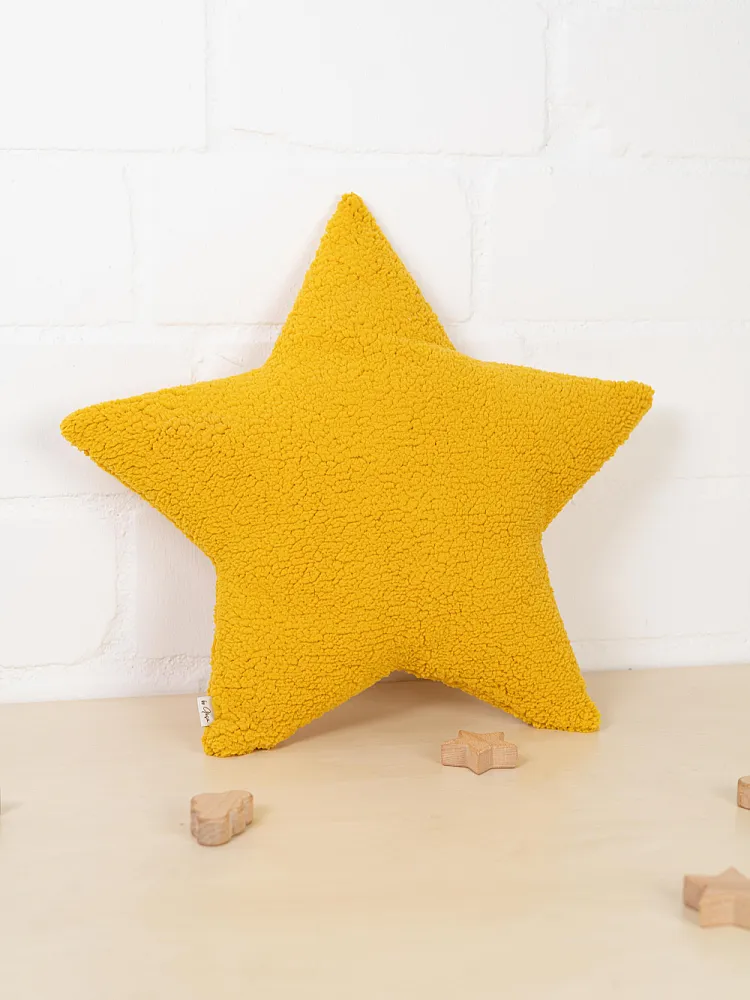
Star Pillow
(7)
3,36 €
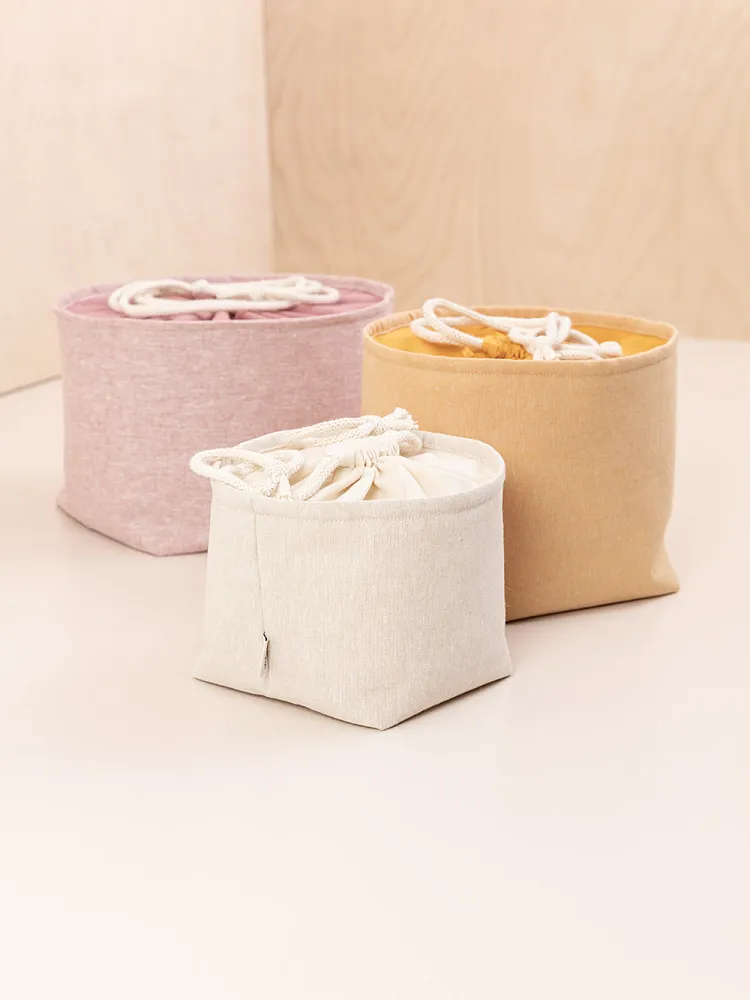
Storage Basket with Drawstring Closure
(4)
5,85 €
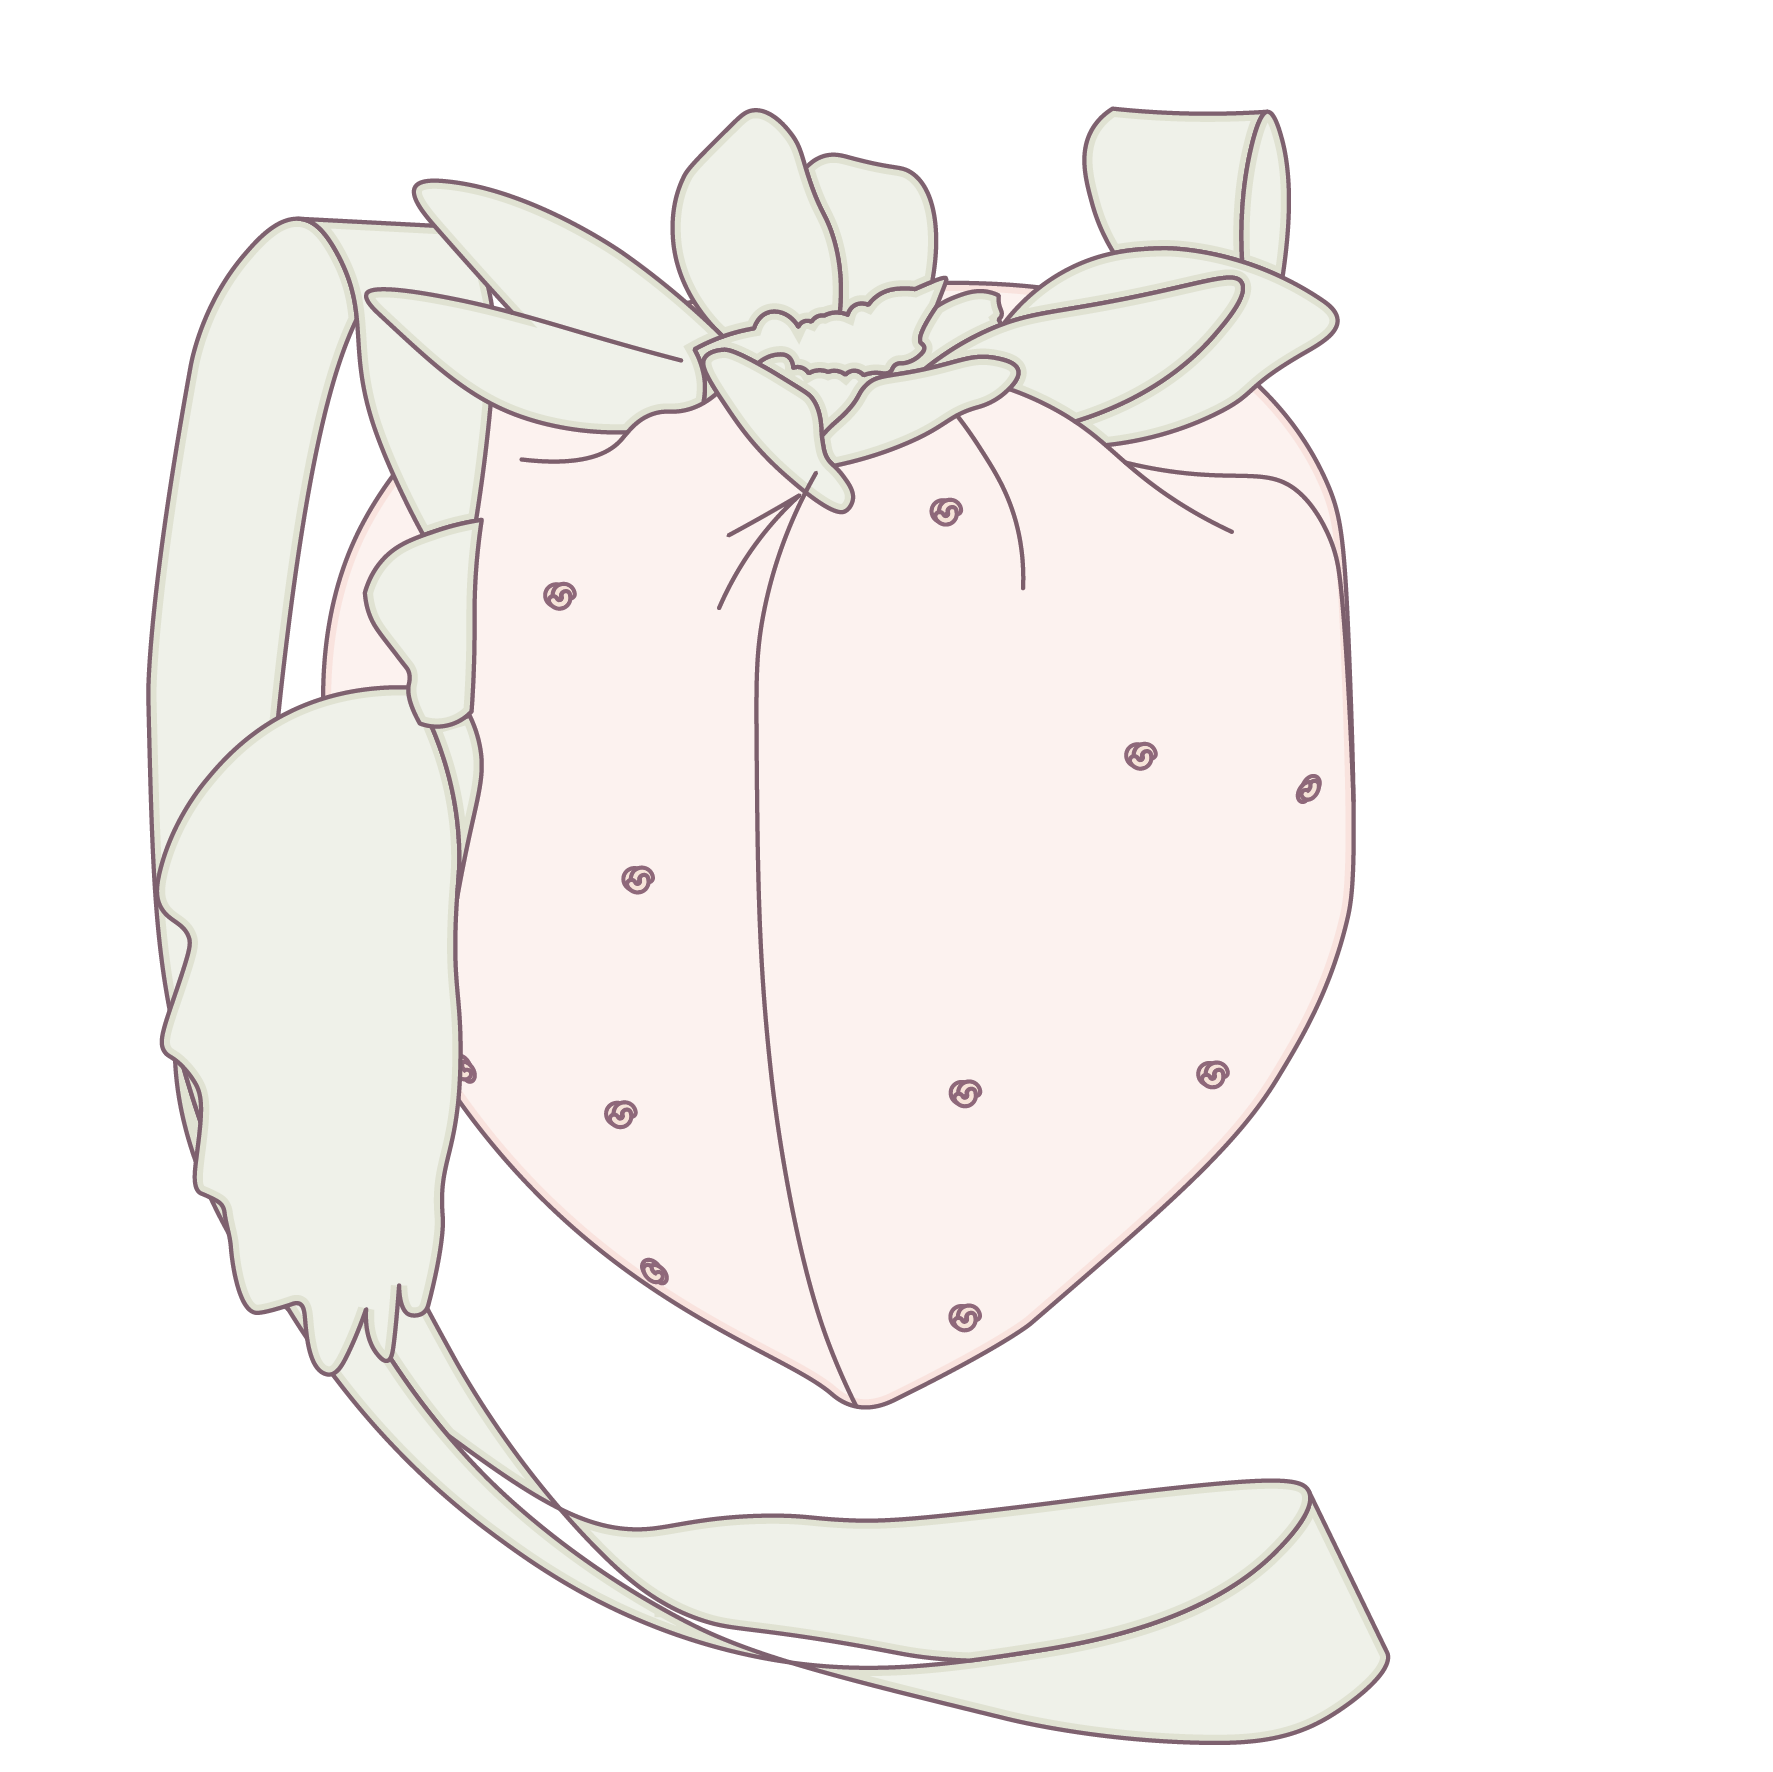
Strawberry Bag
(8)
6,95 €